Balloons are one of the most popular party decorations. They add a touch of whimsy and can be used for many purposes. A balloon arch is a great way to show your personality and add some fun to your event.
There are a few things you need to consider when planning an arch: what type of balloons you will use, how wide the arch will be, and how much it will cost.
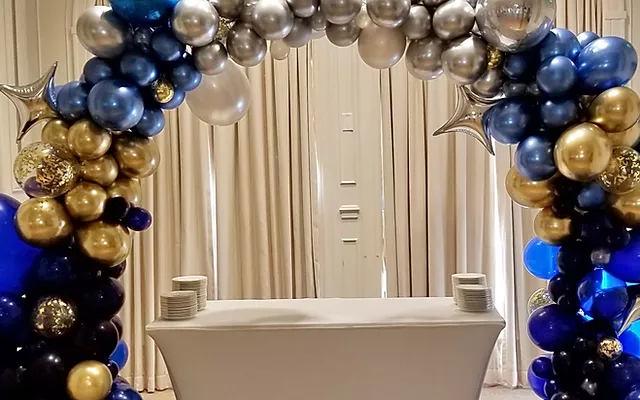
What is a Balloon Arch?
An arch made from inflated rubber or plastic balloons is often used as a decorative feature in gardens, parks, and other public areas. The balloons are usually tied together at the top with a string so that they form an arch.
The height of the arch can be controlled by adjusting the number of balloons used. The arch is usually made from a selection of translucent or colored balloons.
The arch can be used to mark the entrance of a garden, as an entranceway to a party area, or as part of a decoration scheme for any other purpose. It can be used to create a pathway through a garden for people to walk along.
It can also be hung from a tree or other structure in the garden. The arch can be used for several other purposes. It is sometimes used to mark the boundary of an area, or as part of a border design.
How Much Does a Balloon Arch Cost?
There is no definitive answer to how much it will cost, as prices vary depending on the size, material, and installation of a balloon arch. However, most Balloon Arches cost between $1,200 and $3,000.
Balloon Arches can be made from a variety of materials such as metal, wood, or PVC pipe. Installation typically requires drilling holes in the floor and suspending the arch over them with cables or chains.
It can be rather time-consuming to install a balloon arch, so make sure you have adequate space available to accommodate it.
Costs of Other Options
Tube arching is a simple, cost-efficient method of archways that requires no installation. You can purchase a tube arch kit and install it on your own or hire someone to do it for you. Tube arch kits are normally inexpensive, costing between $200 and $300.
Beams
Beams are another cost-efficient option that can be used as a free-standing arch or as an overhang. A beam is simply a metal frame attached to the ceiling with cables and hooks. As an overhang, the beam is tacked to the wall and hung like a curtain.
You can also use beams with arching as an archway. As a free-standing arch, the beam is installed on top of the wall and then angled to create the arch.
Ceiling Lights
Many homeowners install these on the ceiling above their archway. They can also be installed as a light fixture and hung from the wall to create an arched look.
Ceiling Fans
Another way to create an arched look in the ceiling is with a fan. Fans can be installed as either free-standing or attached to the wall. They can also be used as an overhang or arching.
Wallpaper
You can also use wallpaper to create a free-standing arched look. This is a great idea for renters or those who do not have the time or money to take down wallpaper. You can also use this technique in kitchens and bathrooms. The possibilities are endless with this technique!
Tips for Creating an Impressive Arch with Balloons
When it comes to creating an impressive arch with balloons, there are a few tips you can follow to ensure success.
First and foremost, make sure your balloons are of the correct size and shape. The balloons should be at least 2 inches in diameter and as long as you want the arch to be.
Next, you will need a string or ribbon to tie your balloons to. You can use fishing line or yarn, but it is best to use something stronger than a normal string.
Err on the side of smaller balloons if you’re unsure how big an arch you want to create, as this will allow for easier inflation and less potential for balloon leakage.
Additionally, be sure to have enough balloons on hand; an arch with too few balloons will appear lackluster in comparison to an arch made with a more significant number of balloons.
In general, the more colors you use in your balloon arch, the more successful it will be; however, if you want to create a multicolored arch, then make sure that each color is made of different balloons.
Your balloons should be the same size; if you have different sizes of balloons, then make sure that each color is made of balloons of the same size.
And finally, decide on a design before starting to inflation your balloons; this will help avoid any last-minute setbacks.
What to Expect When Installing a Balloon Arch
When planning to install a balloon arch, homeowners should be aware of the different types and sizes of balloons available on the market.
Additionally, they should know about the materials and installation procedures that are necessary in order to create an arch with this type of decoration.
Here is a brief overview of what homeowners can expect when installing a balloon arch:
First, homeowners should decide what size balloon arch they want to install. There are three main types of balloon arches – small, medium, and large.
Each has its own specific requirements for dimensions, so it’s essential to consult with an expert if you’re not sure which size would work best for your home.
Then, homeowners will need to gather the necessary materials. This includes balloons of different colors and sizes as well as decorative materials such as ribbons and streamers.
Next, homeowners will need to decide where they would like their balloon arch to be placed. They should try to place the arch near a window or door that can accommodate an arch, and make sure there is enough room for the arch to fully open and close.
If you are having a large party, consider using multiple balloons. This will make the arch look more realistic and will also prevent it from looking crowded.
Afterward, all homeowners should follow the directions that came with their balloon arch kit and begin assembling the arch. They should begin with the bottom section first, then work their way up.
Once the arch is assembled and fixed in place, homeowners should attach their balloon arch to their wall using the included hooks.
The final steps to take are to blow up their balloon arch and fill it with helium. Once the balloon is filled, homeowners should tie the top section of their arch closed, then wait for it to inflate.
The final step to take is to attach their balloons. The balloon arch should be placed with its bottom facing up, then the top section of the arch should be attached to the bottom.
Once it’s all done, homeowners should take a moment to admire their new and unique balloon arch in place on their walls.
Do you have any balloon arch ideas? Share with us in the comments below!