Balloon letters are a popular art form that uses large balloons as a canvas. Artists use a variety of techniques to create colorful and intricate designs. Balloon mosaic letters are one of the more popular styles, and they’re perfect for creating unique and memorable gifts.
The process is easy, and you can create beautiful designs with minimal effort. The finished product can be used in a variety of ways, including as a centerpiece on the table during a dinner party or as a decorative piece to add pizzazz to your home.
Setting up your balloon mosaic letters is a simple process. To begin, you’ll need a large canvas (such as an old bed sheet or shower curtain), balloons of different colors and letters, paintbrushes, tape, scissors, and glue.
What is a Balloon Mosaic Letter?
The word “balloon mosaic” is a little vague, so let’s break it down. A balloon mosaic is simply a series of small balloons that have been popped and shaped into an image or phrase.
The most popular way to do this is by using a piece of paper as your guide, but you could also use a photo or even just your imagination!
Since balloon mosaics are so simple to make, they make great party favors or even just additions to any room in your house! They’re perfect for children’s bedrooms, nurseries, and any other room where there’s space for a few dozen balloons.
Balloon mosaics are also really versatile. You can create all sorts of different images using just the balloons you have on hand- from animals to happy faces to words.
Don’t have any balloons? No problem. You can just tie a string around the balloon and then twirl it around in the air once or twice, and voila! Your pop art.
What kind of Balloons and Materials are Needed?
Balloon lettering is a great way to add some Fun and Festive Atmosphere to any gathering! There are a few different materials you will need to get started. You will need balloons, an adhesive, and your choice of letter stencils or templates.
To make balloon letters, start by filling a large balloon with air. Then cut out the desired letter shape from your stencil or template. Carefully place the stencil or template onto the balloon, making sure to line up the edges.
Once you have placed the template on top of the balloon, use an adhesive to secure it in place. Let the adhesive dry before flying your new balloon letter!
How to Make Balloon Mosaic Letters.
Balloon letters are a fun and easy way to create a mosaic lettering project. All you need is some balloons, a few pieces of paper, and some scissors. Here’s how to do it:
The first step is to blow up the balloons until they are about twice their original size. You will need at least six balloons for this project. Once the balloons are inflated, cut them into small pieces with a pair of scissors.
Next, place one piece of paper on top of each balloon and use your fingers to flatten out the balloon so that the paper is touching all around the edge. Be sure to avoid the air pocket inside the balloon!
Once all of the balloons have been flattened out, start arranging them in a design you want on your piece of paper. You can place as many balloons on one side of the paper as you want.
For example, if you want to use all six balloons, it would look like this: Be sure to leave some space around each balloon so that there is room for them to expand when they are inflated.
You can use a glue gun to attach the balloons to the paper. I find that it is easier for me to make one long row of balloons and then adjust it later to fix any mistakes
I also tend to make a small “v” in each balloon, which helps to keep them from spreading too much. If you already have a design in mind, you can use the balloons in your design.
If you want to use the same design on multiple papers, make several copies of the same page and then glue each one onto a different balloon.
If you want to make a different pattern for each one, use colorful paper and draw a line down the center of each balloon.
TIP: If you are using regular computer paper, there is not much need to add glue to the backside.
Tips for Creating a Successful Balloon Mosaic Letter.
Creating a balloon mosaic letter is a fun and easy way to add some personality to your holiday decor.
Here are some tips for success
Choose a theme or color scheme for your balloons. This will help you organize your letters and make them easier to see.
Start by loosely assembling the balloons into the desired letter shape. Be creative and use different colors, sizes, and textures to create a unique look.
Once you have the basic letter shape assembled, start filling in the details with smaller balloons. Use different colors and patterns to create a more subtle or bold look, respectively.
Finally, tie all of the balloons together using a fishing line or other sturdy cordage. Make sure everything is tight so that no helium leaks out!
Benefits of Balloon Mosaic Letters
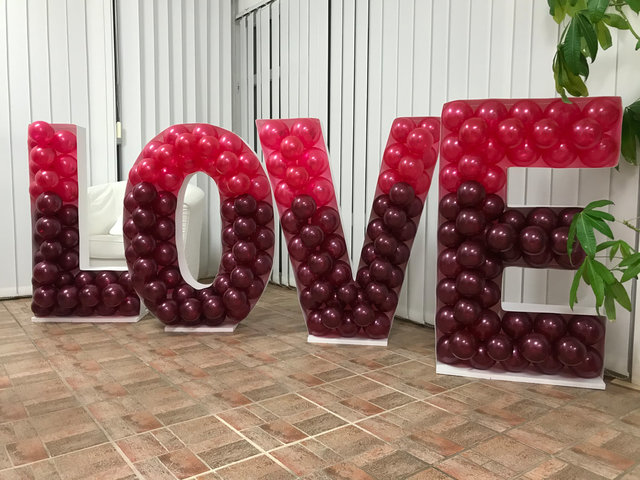
Balloon mosaic letters are a fun and easy way to add some personality to your wedding or party decorations. Balloon mosaic letters are made by threading large numbers of colorful balloons together so that the balloons form simple letter or word shapes.
In addition, balloon mosaic letters are a great way to add some impact to your decor without spending a lot of money on large, expensive decorations like banners.
Finally, the balloons are fairly easy and inexpensive to obtain, so you can make them for very little out-of-pocket cost.